


")
![]()

This work is licensed under a Creative Commons Attribution-ShareAlike 4.0 International License
A Photographic Guide
The Promotions Unit Guide to taking photos
Introduction
The Promotions Unit uses photos widely on its website, including an extensive photo gallery. Photos are added, and updated whenever new or updated photos are available
Photos featured on the site include fire stations, appliances, crews, along with activity shots - CFS crews at work during incidents and training.
The majority of photographs on the site are taken by the two website administrators. This, unfortunately, leads to many photographs (particularly incident shots) being taken in areas reasonably close to Mt Lofty. While it is not a bad thing to show CFS in those areas, it means that large areas of the state do not get a similar exposure, due to lack of photos from those areas.
The website then relies on locating people in other areas, who have a suitable camera, who are able to take the sorts of photos that are suitable for the website, and actually have them sent through!
The following is a guide to assist photographers in getting the photographs that are wanted for the site, in a format suitable for display!
We have now included a guide to photographer behaviour at incidents and activities, for those who respond as part of a crew, and for those who attend an incident on their own. Go to our Behaviour Guide
There are three types of photos used on the Promotions Unit site - Stations, Appliances and Activities. Each will be discussed separately, along with some helpful techniques, and what to do with the end results
- Station photos
- Appliance photos
- Activities - Training / Incidents
- Techniques
- Night time / Low light photography
- End results
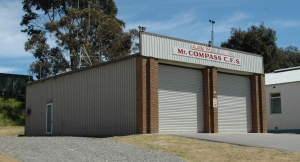
- Preferred photos are in 3/4 view, eg showing the front of the station, and a view of one of the sides, rather than a straight front on shot. This is because a front on shot of the station can be very deceptive, it often doesn't give the viewer any indication of how large the station is. Take a shot with the doors closed. That way, if the brigade gets a new appliance, that photo doesn't have to be taken off the site!
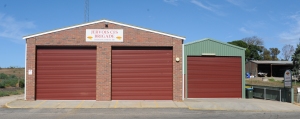
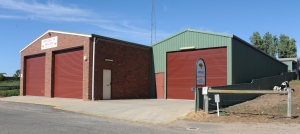
A front view only The 3/4 view of the same station
- Watch out for poles, signs, parked cars etc that might block the view of the station. You may need to take the photo on more of an angle, to get rid of the obstacles

Watch out for poles etc that clutter the photo Poles removed, by taking the photo on a slightly different angle
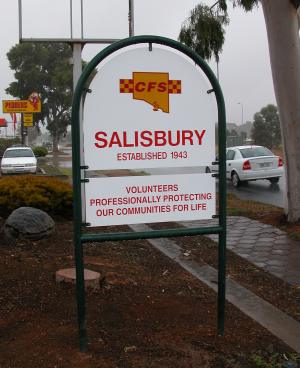
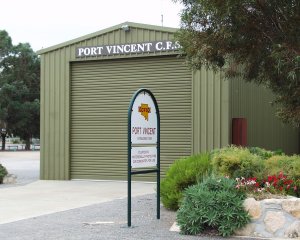
- Take a close up of of the CFS Sign (if there is one) This assists with information for the website. Where possible, include the sign in the station photo
- If possible, take a photo with the appliance(s) out the front of the station, or parked inside, with the doors open. This photo may also include crews.
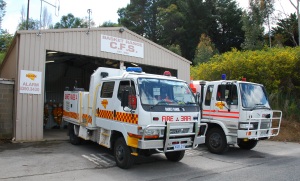
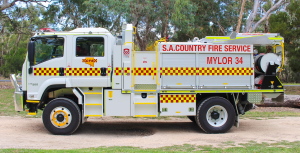
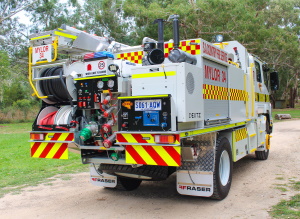
- 3/4 shots are best suited for use on the website, eg showing front, and side of the appliance in same shot , or showing the rear and side
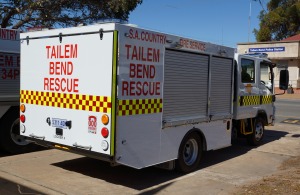
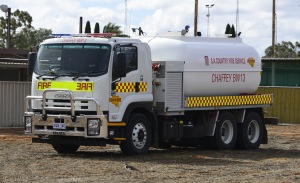
- Take photos from different angles to show the many of the aspects of the appliance - these may be added to our Appliance Gallery, to show the whole appliance
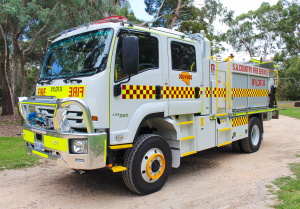

- Be aware of poles etc in the background that might clutter your photo. You may need to change the angle you take the photographs, or take it from the opposite side. (Remember we can cut some obstacles out of the photo, but it makes it easier and quicker if they aren't there in the first place)
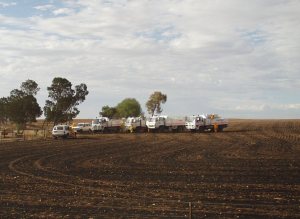
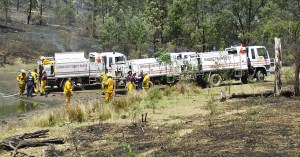
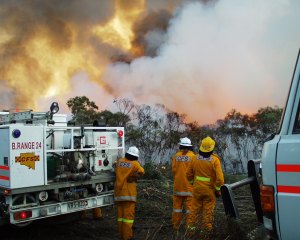
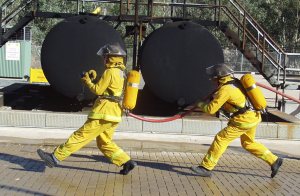
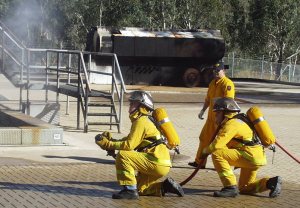
- Appliances, at an incident / training with a crew at work make good photos too. These types of photos can be taken at any angle

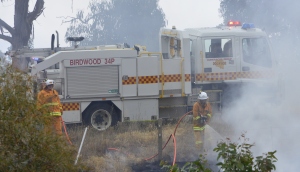
Crews at work , with an identifiable appliance in the photo
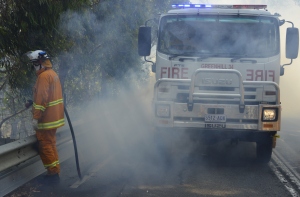
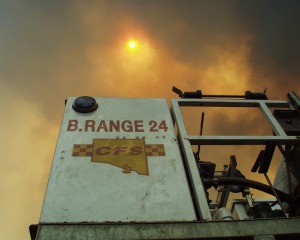
- Where possible, include the brigade name in the photo. That way it individualises the photo.
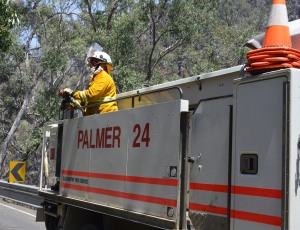
These photos leave no doubt as to which brigade is in attendance
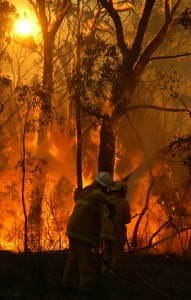
This is the most challenging subject to take, but can yield fantastic photos.
A few principles to adhere to:
- Take lots of photographs (digital camera). The more you take, the more of a chance you have of a getting a really good photo
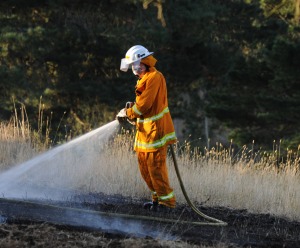
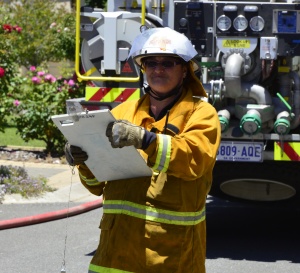
- Really good photos can come out of photographing simple activities, running a pump, talking on the radio, rolling out a hose, observing a scene. You should take your camera out at every incident. You don't need to wait for a really big fire, to get something "spectacular."

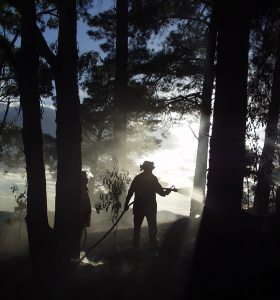
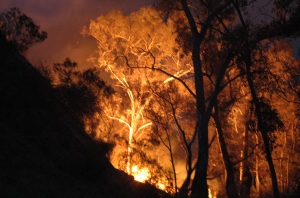
A simple, but effective photo A simple shot
A stunning photo A photo taken in the same area, a few minutes later
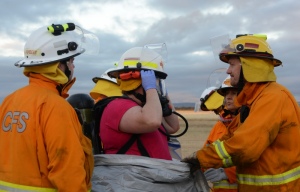
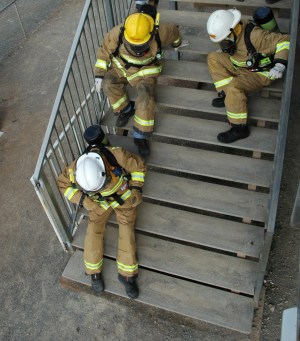
- The focus of your photographs should be the crews and appliances, doing their stuff at an incident, rather than the incident itself. In a real incident, we do not show casualties, however, during an exercise, it can be appropriate to highlight a "casualty"
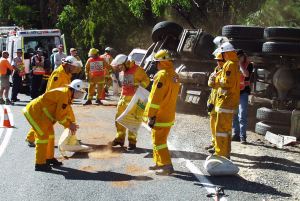
Focusing on the crews, rather than the casualties
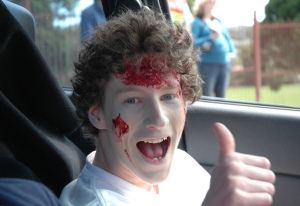
Focusing on a "casualty" - but this is a made up casualty
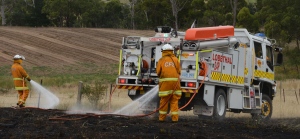
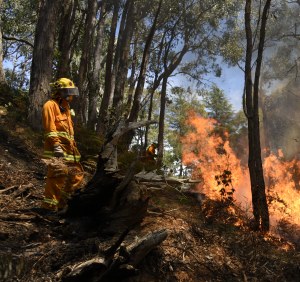
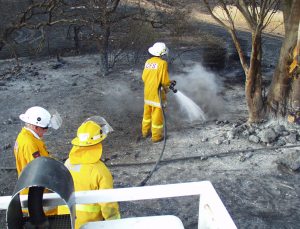
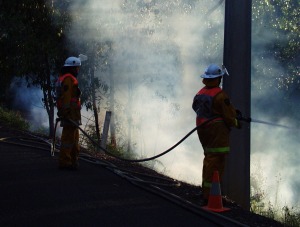
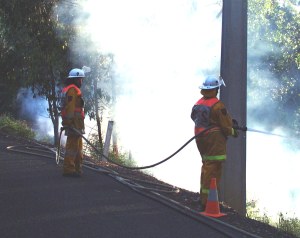
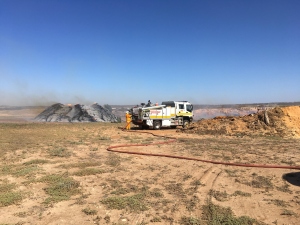
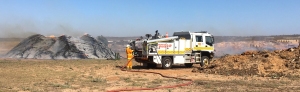
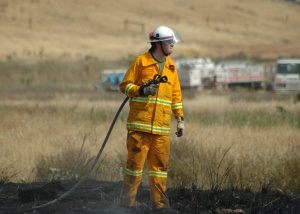
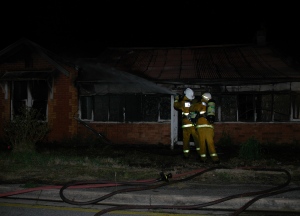
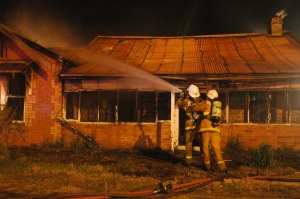
- Photos for use on the website are best to have something CFS in it, for example, an appliance or crew. Multiple photos of a blackened patch of burnt grass, or burnt out building, with no CFS crew or appliance etc is rather boring!!
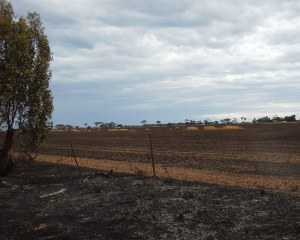
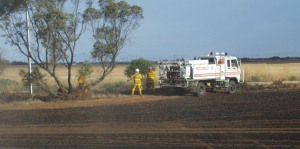
Blackened ground - very boring! Blackened ground, with a crew working – much more interesting!
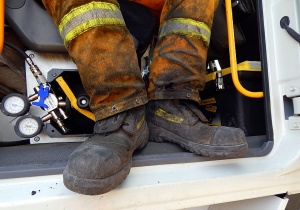
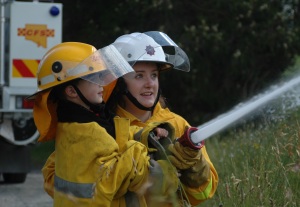
- For photographs to be displayed on the website, crews must be seen to be wearing the right PPC, and doing the right thing in the photograph
A few techniques to consider
When photographing activities / incidents, there are ways to make your photograph look more interesting, and increase the chance of getting a really good photo, rather than an average shot.
- Where possible, don't just take the widest angle shot you can, of the whole scene. Continual shots of this type get very boring!
A wide angle shot, from some distance away A closer view of subject, also from some distance away
- Use a "peeking through" or "looking through" or "framing" techniques – like you are looking past something towards the scene, or framing the scene, or gaining the firefighters view of an incident. Eg the side of the appliance, then looking towards the incident, or looking between the shoulders of two firefighters, towards the incident, or equipment on the ground (eg RCR), with a crash beyond it, or framing with something at the scene, eg a tree branch, or an existing structure
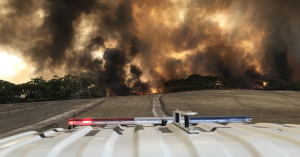
The view from the fire appliance A firefighters view, from an appliance, to what lies ahead
Looking past firefighters "Framing" the action
- Use the zoom function on your camera – without getting in the way, zoom in on your subject – eg one firefighter on a pump, the OIC talking on the radio, with a fire in the background. Some good shots result from taking several shots of the same subject, as the subject moves

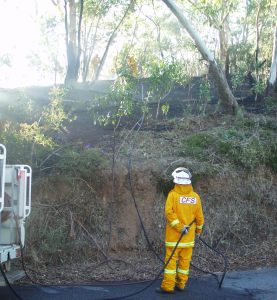
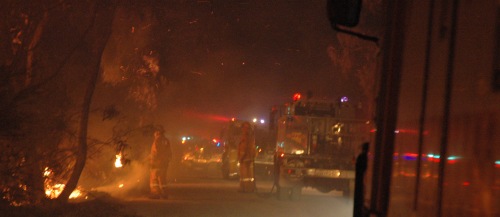
Crews working on hot spots A lone firefighter in the blackness
Crews heading to a training exercise
A rather different looking photo The shot shortly before
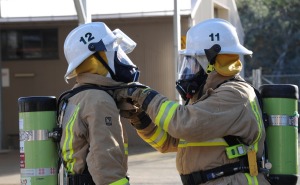
- Take "people" photos when people are not posing for them. Often the best "people" photos are taken when people aren't posing. This does not mean sneaking up on people and snapping them, but rather picking a moment when they are concentrating on something else, rather than you.
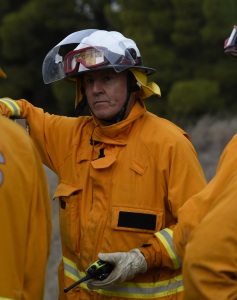
A simple "person" photo Capturing a person photo, while they concentrate on something else
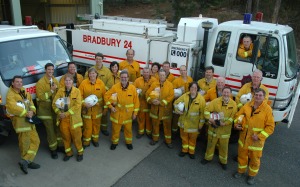
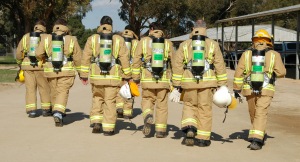
A Group shot – unposed
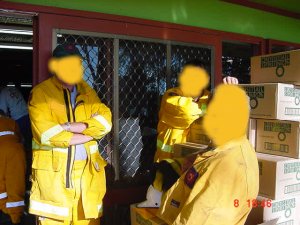
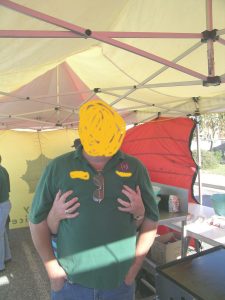
Posed people shots – (faces blanked out for privacy). These types of shots may be useful for a brigade end of season shows, but not particularly useful for our website
- Planned group shots – these take some time to set up, with a nice background, – eg no poles sticking out of people's heads, all subjects know you are trying to take a "nice" posed photo. Posed group shots can be formal or informal. These shots are done with the aim of taking a group shot!
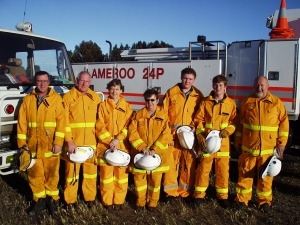

A suitable posed photo A simple Group photo
- Take photos looking down on the activity – eg standing in the back of the appliance, or a ladder
- Take photos looking up at the activity – eg kneel on the ground, and look up at the subject
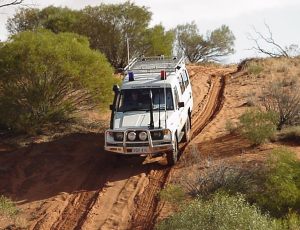
Looking up from the ground A different view of a Command vehicle – looking up the hill
- Once you download your photos, don't delete the ones you don't like! Photos that you may consider fairly average, may be stunning to others (It is often very difficult to critique your own photos!)
- Preserve your original images – if you are going to manipulate the images on your computer, ensure you keep the original image intact
- An average looking photo can be turned into a good, or even stunning shot, by cutting the image, using various computer programs. A dark photo can be turned into a useful image, through the same computer programs.
A photo taken in low light The same photo, manipulated to a lighter image
A rather boring wide angle photo The same photo cut, to focus view on the appliance / crew
- Burn the original photos to a CD, DVD, or save to 'the cloud' to preserve your original images.
- If you have what you consider to be a suitable photograph, please send the original to us (Contact details at the bottom of this page). Copyright of photos displayed on the site remains with the photographer. The Photographer is acknowledged alongside all photos displayed.
- We prefer photos at least 400 K in resolution, or larger, and should be at least 1280 x 1024 pixels. We prefer photos as JPEGs. Photographs used on the site are generally cut, and resized to fit. Larger original images are preferred, so that once cut and resized, the photograph still looks good, despite being a smaller size. (Images used on the site vary generally between 50-150 K)
- Above all, experiment with your photos, take them at every opportunity, and enjoy.
- Please note that this guide is provided to assist people in taking the sort of photos that we are seeking for use on the Promotions Unit website. Photos not taken as outlined above, are not necessarily excluded from use
Night time / Low light photography
Night time / low light photography is perhaps the most difficult and challenging type of photography to master.
This guide aims to give you some information, and tips on night time photography. It should not be taken as a definitive guide to low light / night time photography - more as tips to assist you in your picture taking.
Before starting on the tips, it might help to understand a little about camera settings, (even if your camera is point & shoot).
Shutter Speed
The shutter speed shows up on your camera as a number. In normal daylight , numbers around 60, 100, 125 or 250 or even 500 are common.
The shutter speed equates to the speed of the opening of the camera to let in the light, and hence the image. A number of 125 is actually the shutter opening for 1/125th of a second. 60 is the shutter opening for 1/60th of a second.
The less light you have, the "slower" the shutter – that is, it stays open for a longer time, to let more light in.
So why do you need to know this?
Basically, if you hold your camera, and take pictures, when the shutter speed is 30 or less (eg 1/30th of second) then you cannot physically hold your camera still enough for that long, without moving, just a little, and so you will end up with a picture that is not quite in focus.
The slower the shutter speed, the blurrier the photo will get, if you "hand hold" the camera. A blurry photo, as a result of a slow shutter speed, when hand holding the camera, is known as "Camera shake"
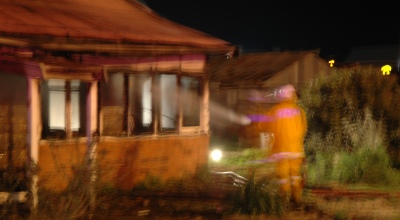
To avoid camera shake, you need to either increase the shutter speed, (make it faster) by changing other settings, by using a tripod , or by using a flash.
Aperture
Another camera setting is the aperture setting. This equates to the size of the hole that opens to allow the image into the camera. Commonly, the aperture is represented by a number - commonly 3.5, 4, 4.5, 5.6, 6.3, 8, 11 etc (although the numbers may vary from camera to camera.)
The lower the number, the larger the aperture, (the bigger the hole) and the more light gets into the camera. The higher the number, the smaller the aperture, and the less light gets in.
So, in low light, shooting with a larger aperture - smaller number - allows you more light into your camera, and hence your image.
Film Speed or "ISO" (previously called "ASA")
This is another setting you may be able to change on your camera.
The film speed typically has settings of 60, 100, 200, 400, 800, 1600 etc. It equates to how much light the "film" needs. The lower the number, the more light is needed. The higher the number, the less light the "film" and hence the camera, needs
So, on a bright sunlit day, a "slow" film speed - eg 100, will mean there is plenty of light available for your photo. In darker conditions, a "faster" film speed - eg 400 will give you enough light for your photo to work. In very dark conditions, a film speed of 1600 or more may allow enough light for your photo to work.
Hence, if you are going to take photos in low light, the higher numbers ("faster"
film speed) gives you a better opportunity to capture those images, by allowing
other settings - particularly shutter speed, to be more suited to taking suitable
photographs.
However, the faster the ISO (eg the higher the number), the "grainier"
the image may be.
The Shutter Speed, Aperture & film speed interaction
While we have looked at the shutter speed, aperture & film speed each in isolation, they are all closely related in setting up your camera to take photos.
If you change one setting, it will impact on the other settings. Confused yet?
Let's look at some examples:
It is late afternoon, with the sun is almost set.
Let's say you set your camera to "auto" - so that it picks all the settings for you, so all you need to do is point it at the subject & shoot. You choose not to use the flash, and have switched it off.
Your camera might pick the following settings:
Shutter 20, Aperture 5.6 ISO 400
With a shutter speed of 20 (that is the camera opens for 1/20th of a second) to let the image in, you are not able to "hand hold" the camera still enough to get a clear image. So you either need a tripod (or something solid & still to rest the camera on), use the flash (which for this picture you choose not to) or change the settings on your camera.
So you choose to change the settings. You change the ISO to make it "faster" - that is, it needs less light - and change it to 1600. Because the camera now needs less light, you can then change the shutter speed to 1/60th of second, - that is the camera is open for a shorter time -which means you can hand hold it, and take a clear picture.
Please note, this has been given only as an example. Settings will vary from camera to camera, and from different situations - different light, different coloured subjects, whether or not there is an object behind the subject, and what colour the object is, and more.
If your camera allows you to alter any or all of the settings, then have a go at changing them. Pick one setting, and work at changing that one, and see the effect it has on the other settings.
Many cameras will have settings such as "Aperture priority" and "Shutter priority" and "Manual"
"Aperture Priority" allows you to set the aperture, and the camera picks the other settings.
"Shutter Priority" allows you to set the speed of the shutter, and the camera picks the other settings.
"Manual" means you can pick the shutter speed, the aperture, and depending on your camera, may also allow you to pick the ISO.
Why set an aperture?
If you have an auto camera, and it takes suitable pictures, why would you need to set a particular aperture?
Aperture has an affect on the "depth of field."
So what is "depth of field?"
If you have a good depth of field, it means everything in your picture in clearly in focus, no matter where in the photo it is.
A poor depth of field means not everything in your picture is in focus. So when is this useful? Let's say you want to focus to be on the fire-fighter in the picture, but you have other subjects in the background that you don't particularly want to show in the picture, but you can't move them out of the way. Depending on your aperture setting, you can "blur" some of the background, and focus on your subject.
To create a poor depth of field - to get the effect of blurring out the background, you need a low aperture setting - eg 2.5, 3, 5.6 (settings may vary from camera to camera).
A slightly blurred background, with the focus on the people
To have a good depth of field - that is all the subjects to be in focus - you need a higher aperture (small hole) so settings generally of 8 and above are best.
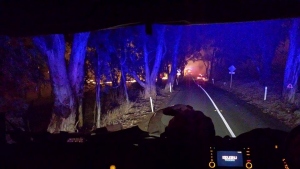
If you have an auto focus camera, be aware of where it is focusing, otherwise you can end up with the focus on the wrong subject!
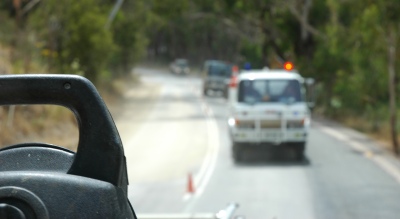
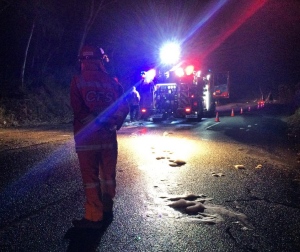
The focus was meant to be on the appliances following..not the spot light on the photographers appliance!
Why set a shutter speed?
If you use your camera on an automatic setting, and it takes good pictures, why do you need to set the shutter speed?
As mentioned previously, you cannot "hand hold" a camera, perfectly still, and get a perfectly in focus picture, with a shutter speed on 30 or less (that is 1/30th of a second or slower).
If you don't have a tripod, or something solid to rest the camera on, then your photos will generally show signs of camera shake. (And remember, just because the picture is not in perfect focus, or it shows signs of camera shake, doesn't automatically make it a bad picture).
However, if you want your picture to be very clear, you need to ensure that the shutter speed is MORE than about 30 (that is more than 1/30th of a second).
There is also another important reason for setting your shutter speed.
Shutter speed "stops" motion. If you have a moving subject, and want to "freeze" the subject, and capture it in your picture, you have two choices - you can capture the subject with a fast shutter speed (eg over 1/500th of a second) and you absolutely stop the subject. If you choose a slower shutter speed (like 1/60th or slower) then you may capture the "movement" of the subject.
Capturing movement, due to a slow shutter speed (left), freezing movement due to fast shutter speed (right)
So, the faster the shutter speed, the more movement you can stop.
Flash
The use of flash in low light can assist in taking a clear image, by providing extra light on the subject, and leading to a "faster" shutter speed, and (hopefully) a clearer, non blurry picture.
However, there are a few limitations of a flash.
Generally, for a flash, the light intensity diminishes greatly as the light moves away from the camera. The light diminishes at a rate of 1/X2 , where X is the distance from the camera.
This means that if you photograph a subject 2 metres from the camera, then the light intensity at that subject is ¼ of what it was when it left the flash. If the subject is 4 metres away, then the intensity of the light at that subject is 1/16 th of what it was when it left the camera.
A photo, using flash (left) , with the same location, without flash (right)
So, the further away from the flash the subject is, the less use the flash is!!
Some flashes are more powerful than others - and some may work over a longer distance than others, but the flash in very dark conditions, trying to photograph a large subject, some distance away, is not going to be very helpful!!
Other considerations with flash
The effectiveness of a flash will vary, depending on the subject you are photographing.
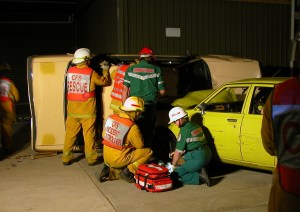
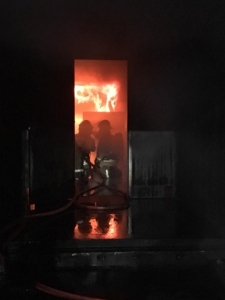
If you have a large subject, relatively close up, then the flash will be more effective, as the light has a surface to bounce off, and back to your camera, and hence giving light to your image, which is recorded in the camera. Light coloured backgrounds are best. A dark coloured background (like a wall) will absorb light, and it will not bounce as much light back to your camera, as a light coloured background will.
Photographing without a solid background will need much more light then the same subject in front of a solid background - eg photographing a crashed car in the middle of a paddock will need more light, that photographing the same car in front of a cream brick wall.
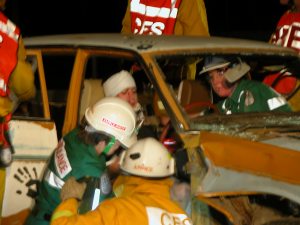
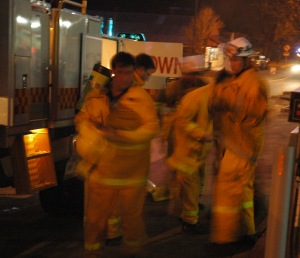
There is a problem, unique to Emergency Services, which you will encounter when you use flash. Emergency Service personnel and their vehicles are covered in reflective material. Using a flash highlights that reflective material.
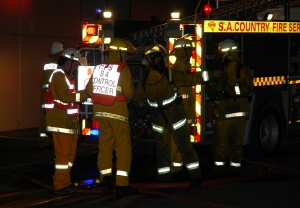

While it can create a good effect, (left) it doesn't always work (right)
So, what does all of this mean to you?
Don't rely entirely on the flash to light up your subject - particularly in very dark conditions, it isn't going to be particularly effective, and may annoy other personnel working at the scene, with bursts of flash blinding them.
If you don't use your flash, and your shutter speed is slow, you will need a tripod, or something else (like a fence post) to place your camera on, to limit or eliminate 'camera shake.' Generally placing a camera on the back of a fire appliance, which has the engine running, will create vibration in your camera!
If you use your flash in low light, try and have something solid behind your subject, which will allow the light to bounce back to your camera, and maximise the amount of light getting back to your camera, and hence a lighter image.
Many cameras come with special settings for taking photos in low light - experiment with them. (You will still need a tripod, or something steady to place the camera on). However, if you have such a setting, practice with it - see what it does. You may also like to experiment with some of the other settings on your camera - such as aperture priority or shutter priority.
A digital camera allows you to take multiple photographs, with no added cost. So take your camera out, and try out the different settings on the same subject. See the effect of changing an aperture, or the shutter speed, or ISO. Try taking a picture of subject in lower light, some pictures with a flash, and some without. Take your camera back and download the photos onto your computer, and have a close look at them, and see what settings work best for you.
And remember, just because your picture is not in perfect focus, you have some camera shake, or the people in your photo are moving, and are blurred, does not automatically make the photograph a bad one!!
If you have photos that you think would be suitable for display, or you would like some feedback on them, please email (or post) them to the details listed below.
If you have what you consider to be suitable photographs,
please send them to
pip@fire-brigade.asn.au
or mail your CD / DVD to the - CFS Promotions Unit
Website, PO Box 73, Basket Range, SA. 5138